Welcome

Over the last several years I've been dealing with various stages of disability thanks to ALS. My goal is to share solutions and review various products/tools/devices that I have found particularly helpful.
Showing posts with label problem solving. Show all posts

Wednesday, 8 October 2014

The Pilot's Modular Knee Board

I'm finally back for another, much overdue blog posts! My apologies for being away so long, it took some time to reorient my technology needs after the broken arm. I had to acquire a Windows surface and a tobii eyetracker , consequently I have been occupied With setup and configuration.

Now that has been said, on to the meat and potatoes of this article :-)

A while back I picked up a pilot modular knee board on from CP gear. The idea was to find a way to things like my iPhone and ID for adapted transport visible and easily accessible. One of my criteria has always been to minimize the amount of stuff in front of particularly things like tables attached to my wheelchair. That said, I will admit right at the
beginning that it didn't work quite as I had envisioned. But on occasion it has been extremely helpful.

I do pilot my wheelchair... right?
So I obviously need wingmen... right!
Most recently, I've been using it for things like grocery lists and managing my paper work at the hospital. These days, I usually get off at the hospital and left on my own as I can still communicate and get around quite well wheeled 2.0 I don't need an assistant following me all the time. So we start my iPhone to the need knee board along with my hospital cards. This allowed people to easily access what they needed, with my supervision and not rummaging through my bag. Kept everything nice, organized and easily accessible.

By sticking my iPhone to get on a band of Velcro tape I was also able to (relatively) easily maintain text message communication via Siri while I was there.

The board is comfortable to wear (with pants. With the shorts…meh!) on either leg and stays put quite well.  It is attached by a pair of Velcro loops that you close around your leg.

Personally, I quite like and I would say it is well worth the cost of C$50. It comes in one of three colors. Black, e Pat camouflage and optionally has a bunch of accessories that can be velcrod to it. Other pouches for example.


And a huge thanks

I would also like to give a shout out to William Cassan for his incredibly generous donation to this blog. It is greatly appreciated and will go to financing the exploration of other useful tools :-)

Monday, 21 July 2014

Another tweak for the Griffin Beacon

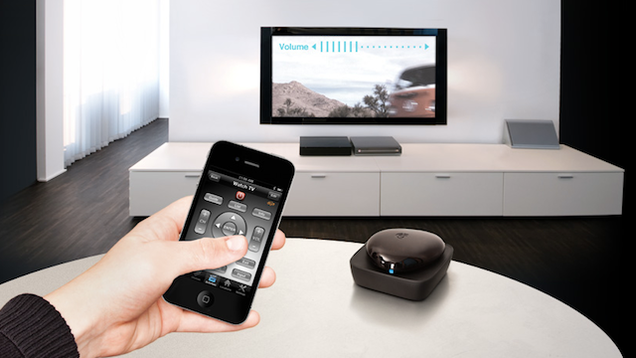
I've talked about Griffin Beacon before. It's a great way to control your to television and PVR from your iPhone or android device. But as we discussed it does have a few issues. We talked about a result the battery consumption issue but the one remaining pains in the butt is that the device will go to sleep if it is been without Bluetooth communication to your device for over an hour.

So if you come back from having left the house safer groceries and doctors appointment or something. The device is off and there's no way to wake it up without touching it. And sometimes, my helper leaves before I realized the place has been turned off. Needless to say, without the function of your arms or a stable ability to walk this is a problem.

So it occurred to me that after the move I had an extra controller for my Vera home automation which was no longer being used. So I thought, why not plug my hacked Griffin Beacon into the control switch? This way, using my iPhone I simply have to cycle the power to the beginning. When the power comes back on, the BK wakes up in searches for my phone. Automatically connecting.

BOOM! Problem solved.

The downside to this is that the typical Vera visual switch runs about $40-$50. So it might not be the best solution to run out and buy one. But in my case, it was no longer being used so this worked out perfectly :-)

Sadly however, it would seem the grifin beacon has been discontinued.

Tuesday, 6 May 2014

That's One Fine Coat

One of the ongoing problems I've been continually trying to address is that of comfort. With the extension of atrophy in my arms, which are essentially skin and bones these days. I'm finding that propping my elbows on pretty much anything can get rather uncomfortable rather quickly. Including my wheelchair.

I looked up all sorts of elbow pad options in the past, these tend to be rather tight fitting around the arm making them happy and not terribly comfortable to wear. Not to mention hot. The gel filled elbow pads were particularly bad for heat. Not to mention they were rather heavy. I will admit, they worked rather well.

Velcro insert pockets
on the elbows!
The other day while rotating around the Internet doing some window shopping for a light coat to replace the one I have I stumbled across the tac.u Coat from propper. It's basically a military style field jacket. But what is interesting about it is it has Velcro insert pockets on the elbows. Allowing you to insert elbow pads, or in my case a thin sheet of high density foam. The foam is very lightweight and being only half an inch thick makes it rather flexible. This is just enough padding to add an extra layer of comfort and take the sharp edges off of whatever I'm putting my elbow on.

The jacket is available in all sorts of other military colors/camouflage and is quite reasonably priced at US$40. Myself I chose the black one, but I do have to admit. The subdued urban camo is pretty cool.They are easy enough to find on Amazon.com, eBay and various tactical websites. I ordered mine from ACU.com which seem to offer the best shipping rate Canada.

On a side note, one of the fun things about the Coat is and has all sorts of Velcro patches on the shoulders which are intended for military badges and insignia. However, we've taken a bunch of Velcro tape and stuck it to some fun things/toys from my Four year old boy to Stick to me. Including the back of my iPhone. He finds it rather hilarious to watch YouTube while it stuck to my shoulder.

As limiting as I am in the way I can interact with him, got to find ways to be creative. And this that means looking a little silly, so be it! ;-)

All in all, so far I quite like the jacket. I should point out however the slaves are quite baggy. I ordered a large, which usually works out quite well for me. However in this case it turned out to be rather loosefitting around the chest. I probably could've done with the medium. But it does make for very good spring jacket.


I would also like to just take a second to send a big thank you to Albert Wojciechowski for his contribution to this site :-)

Friday, 6 December 2013

Remote PC Start up Tools & Siri proxy

This is a little project that is kept me occupied for some time now, partly to do with a few difficulties in implementation. But the idea is to allow me to remotely start my computer without having to find my way to the basement to do so.

So why would someone want to remotely start the computer? Well I download quite a bit of media which is stored on the hard drive of my desktop and I use media streaming to send this content to one of my gaming consoles so I can watch it in the comfort of my family room which is on the ground floor. My desktop PC is in the basement separated by a flight of stairs with big nasty scary teeth and with mobility issues, I don't always feel like taking the chance. Especially when the lighting conditions are a little dark. For some reason this really messes with my balance, making stairs downright hazardous at times.


I tried a couple different apps, and hit a few speed bumps on the way that were not expected. Here's what I found.

First off, the speed bumps

Every motherboard on your computer nowadays will have a wired network connection. If you go through the BIOS is just about guaranteed that it will support some sort of wake on LAN functionality. Simply enable it, and you should be good to go right?

Well, not so much.

I have an older Asus motherboard that those sales for wake on LAN. I figured this should be enough. Enabled it, set the magic package and would only work immediately after shutdown. The motherboard power savings would shut down the network connection is well after a period of time. This caused quite a bit of annoyance.

So for about $10, about it PCI express network card. This solves the problems. Once the BIOS was set, the PCI express port maintained power, even after the PC shutdown.


Secondly, not all routers will support away, and set up. In particular Linksys routers (which is what I have) don't allow you to set the subnet mask 255.255.255.255 which is required to forward the magic packet the subnet mask needs to be set to 255.255.255.128. Contact Linksys cares technical support via twitter. They were very helpful with me for sorting this out.

How does it work?

Very simply, we will be using a computer or a smart phone to send what's called a magic packet over your local area network to the desired (powered down) computer. Once you BIOSes appropriately set up, your network card essentially never sleeps and monitors the network for the appropriate magic package.

There are a couple ways to send this.

iShutdown Is probably about the easiest way to go. Simply install the app on your smart phone and then from the link here, install the service on your desired desktop. Once everything is installed, with your PC running simply search for the server via the smart phone app. It should detect it right away. This will allow you to remotely start and stop your computer and has a very nice interface. It's also very easy to monitor several computers if you so choose.

This simplicity makes it well worth the $2

Your next the best option would be to try send a magic packets with depicus.com. This is also a very good app. Works flawlessly, but is a little bit more technical as it exposes you to more of the raw details. It however also has the scanning function to find computers on your network. But what is very interesting, is that also offer a free wake on LAN packet sniffer which will allow you to view magic packets that are being sent and received by your PC. Very useful when you're setting things up to make sure things are going to the right places

This is also $2 on the App Store.

Then there is the Siri proxy… My personal favorite!

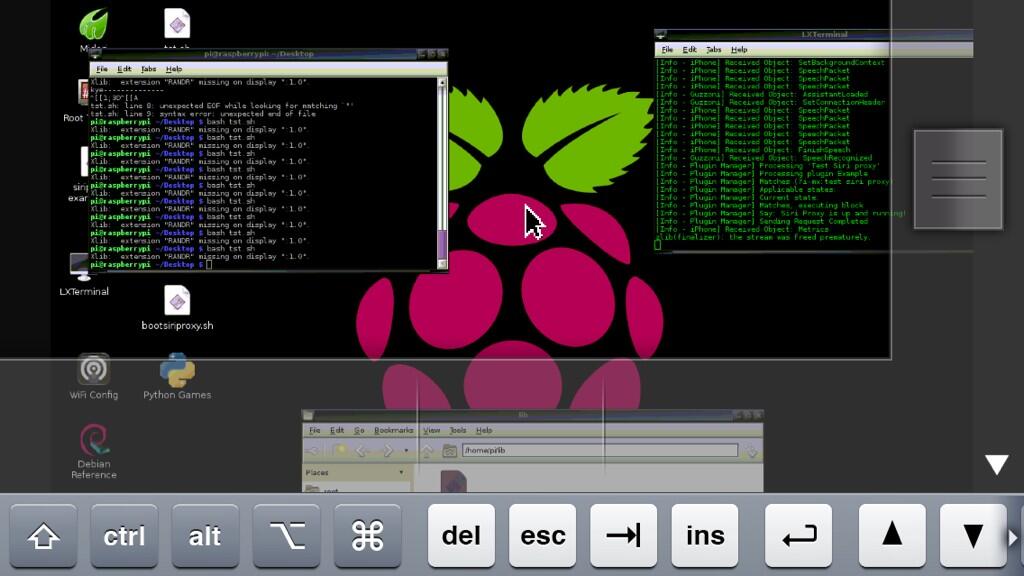
If you've already figured out how to get Siri proxy running on raspberry pie, this edition is actually really quite easy, and it's free! If you are running Debian like me. Go here for information on the install
  • open terminal and type
    aptitude install wakeonlan 
  • test the install
Once you are sending and receiving magic packets from your raspberry pie to your PC via terminal, is just a simple matter of adding the recognition block into your Siri proxy script, editing your Mac address, rebundling and restarting your Siri proxy.
#wake on LAN-------------------------------------------------
   listen_for /wake up my (computer|PC|desktop)/i do
     
    say "waking up your computer"
    system 'wakeonlan -p 7 YOUR_MAC_ADDRESS'

    request_completed #always complete your request! Otherwise the phone will "spin" at the user!
  end
And this should be enough to get your serial proxy sending magic packet.

But having set this up, if I decide to watch a movie I simply voice activate my iPhone, tell her to wake up my computer and within a minute or so the media servers visible on the network.

Very convenient, very fun. :-)

If you're looking to set up a wake on LAN, I hope this helps you set one up.

Friday, 19 July 2013

Reading without thumbs

It's been a long time now since my hands have let me hold on to anything. Papers are particularly a problem, and I can forget books. However I do want to keep up on my literature from time to time. I particularly enjoyed reading on my iPad. I have an iPad three, with the retina display which makes the reading experience really quite enjoyable. Sure, I can't use all of the features that easily anymore, but I can still tell the reader to scroll and or turn the page.

For a while I used a folding cover for in this worked okay for a while. But where I'm at now, this is extremely awkward to get set up and sometimes a pain in the butt to keep his position.

A while back, a friend of mine posted a picture of himself using something from the Apple store called a hover bar. This is essentially a flexible bar that you clamped to your table with a flexible arm which is about 2 feet long. Your iPad snaps into this, you bend it into position and it holds itself up right.

I thought this was quite a neat idea worth trying. They were however asking C$80 for it, which seemed a little bit much. So I decided to try an exact copy of it I found on Amazon.com for about $50 called a GMYLE® Black 360º One-way Clamp Adjustable Arm Stand . The only difference that I could tell was in the clamping mechanism. As opposed to using an Allen key, it has a built in arm to turn a screw on clamp.

I'm reasonably pleased with the purchase, I am however trying to figure out how to make the best use of it. Not quite worked out all the kinks yet. Is what works and what doesn't:

awesomeness:
  • hold the iPad in position as advertised
  • makes it possible to read fairly comfortably.
  • Will support nearly unlimited positions and orientations
  • you can clamp it just about anywhere (even a hospital bed if need be)
not quite so awesome:
  • as my arms and hands are extremely weak, it can be very difficult to reposition.
  • The ball joint on the back can be a little loose, causing the iPad pitch down out of position.
  • once my iPad is clipped, there's absolutely no way I can get it out myself
Little bit of both:
  • depending on what I'm doing, it can make it easier to access certain features or parts of the screen or more difficult. For example reading iBooks or magazine once it's open is much easier. However maybe pushing the "library" button within ibooks might be more difficult to reach.
All in all, I'm reasonably pleased with it. I don't know if I would have been quite as happy if I had purchased the $80 version and had the same difficulties with it. But for $50 it feels like money well spent and does help me keep reading and very pleasant format. The iPad is great for reading a wide variety of formats… I'm particularly enjoying the walking dead graphic novels and popular science magazines from the newsstand. Unfortunately it's not helping me get back into playing even some of the simpler games I have to pass the time (Magic the gathering on iPad is great).

final verdict?
Not totally sure… Thumbs up or thumbs down.
Honestly, little bit of both.
I had however hoped it would worked with Griffin Beacon as my remote. While it communicates fine, it doesn't help me with the ease of access. I still prefer to go back to my iPhone that.

It will however be a great set up for videos and Netflix.

So all in all, I have to admit I'm not totally sure if it's a 100% thumbs-up or thumbs down. It solves some problems but incurs a few others. So I'll say this, if you have the spare cash it's worth a try. I do enjoy being able to comfortably read again, and not being tethered to my PC to do so… So I guess that's a little more of that thumbs-up.

Tuesday, 25 June 2013

Raspberry pie versus Desktop

I know, I'm a bit overdue for a post. One of the reasons being is that I decided to try running a raspberry pie for my Siri proxy and have been occupied playing with that. Initially, I was just going to use the desktop that was arranged for me my friend. A Siri proxy is a great use for an old machine, and the one that was given to me was a beast in its day, grossly overpowered for my needs.

As you saw in the previous post about setting up a home automation system, the setup was reasonably easy. It did however require that at first the Ubuntu machine has a keyboard mouse and monitor hooked up to it. Once this is all done, I could fairly easily use VNC to connect to it. From there I can use all my assistive technology to do the installation I need. But the initial setup was a bit cumbersome for this reason only. Without hands that works very well, the required manipulation of the keyboard and mouse was challenging. The other thing is that the old desktop, being is overpowered as it was generated a fair bit of heat and consequently had a number of fans and to keep cool. The machine was a bit noisy.

So, for a friends birthday we thought a raspberry pie would be a perfect gift for him and on a bit of an impulse (also some encouragement from my girlfriend) I decided to order one for myself as well knowing it could be used as a Siri proxy. After all, this is how siri proxy first came to my attention with Elvis impersonators raspberry pie garage door opener.

I did need to help to set up initial wiring and plugging the SD card. But once that was done, set up was actually far easier than with the desktop, and not just because I'd gone through the process previously. Out-of-the-box, once the pie is plugged in it boots up by itself (no power button) it is set up to network into it immediately. No need for a keyboard, mouse or even monitor. Simply use putty.exe to get started. The raspberry pie is dead quiet. There are no fans, nothing to make noise. As a matter of fact it requires only 5 V to run this the 700 MHz, credit card sized computer. Pretty impressive, especially for just US$40.

Want to give it a try? Here's what you'll need…

I am presently running my pie headless (without monitor or keyboard) and am going to assume you're wanting to use the same here.We ordered everything from www.adafruit.com Here's the minimum parts that you will need to get started:
  • A raspberry pi model B. US$40
  • 5 V power adapter a micro USB cable. US$10
  • SD card for Raspberry Pi preinstalled with Raspbian Wheezy US$15
  • network cable.
And that's it! You can get a raspberry pi, Siri proxy server up and running for about US$65. I would however recommend also purchasing a case for it, it's always a good idea to protect and exposed circuit board. You can buy one for as little as US$10

I based this list on the starter pack listed on their website. I figured it was a good safe place to get a list of everything I would need. The starter pack includes a whole bunch of stuff for wiring and doing custom electronics, nothing I would need. Just for fun I also added a very small 4.3 inch TV monitor for an additional US$50, which I have yet to hook up. But my friend got one as well and he loves little thing.

Setting up your pi…

I chose to purchase the preinstalled SD card for pure simplicity reasons, it was only a little bit more expensive and I figured doing so would save many headaches of trying to manipulate the card between my desktop and the pie. My dexterity can't handle it anymore. This way I was sure of the install that would work right from the get go.
  1. Plug everything in (Duh). Make sure the SD card is properly seated, you have power and network. When the pi is booted (should take only a few seconds) you should be rewarded with several LED lights. Red yellow and green. If you are greeted with a solid read only, your SD card is probably not well placed. This happened to us. Unplugged the pie, reseat the card and try again.
  2. Find your pie on your network. In order to be able to connect to it remotely, you need the pi's IP address. You can find this fairly easily through most newer routers or you can using IP scanner.
    These are excellent instructions for your first time login using SSH
    Raspberry Pi SSH Login without Monitor
  3. Through SSH login, enter this command:
    sudo raspi-config 
    then follow this first time set up guide
    As mentioned, out of the box you should be able to network into your pi using SSH. However there are a couple things you will want to make sure you do:
    1. use your whole SD card
    2. check for updates
    3. check the boot behavior is set to desktop
    4. optionally change the default password for user pi (I believe the default password was…: pi) keep in mind, Linux-based systems such as the raspberry pie are case sensitive particularly important for remembering your passwords ;-)
  4. Now to install and set up VNC
    1. these are the instructions I used, but a very good step-by-step guide here: http://learn.adafruit.com/adafruit-raspberry-pi-lesson-7-remote-control-with-vnc/overview
    2. Personally I followed these instructions:
      http://myraspberrypiexperience.blogspot.ca/p/setting-up-vnc.html 
      once VNC is installed, you will no doubt wanted to start on boot. These instructions will walk you through the process
      http://myraspberrypiexperience.blogspot.ca/2012/08/start-vnc-automatically.html
    be sure to specify which desktop
    you want to connect to
  5. reboot your pi (type reboot ) and reconnect using VNC
    start VNC viewer on your desktop, enter the IP address of your raspberry pie followed by :1
    the reason you want to do this is that you are specifying which desktop to connect to. You can run multiple desktops.
And there you have it. Your pie should now be up and running with a VNC connection.

One thing I should point out about VNC is while it's a great and convenient way to access your pi it does have a few limitations. You can use the accessibility tools from your Windows environment, for example I can use DragonDictate to send text and controls directly to the pi. However I cannot copy paste from my desktop through VNC onto pi, which can be a bit inconvenient (possibly because I'm using the free version).

Another reason why VNC is Uber cool
I can connect to my pi from my iPad or iPhone!
Installing Siri proxy on your pi

The best, and probably easiest way would be to follow Elvis impersonator's instructions. I installed mine through SSH, one command at a time. This step is a little bit more complicated as you will have to take out the commands from the text file one by one. Nonetheless, it's pretty straightforward and you will find the complete list of instructions here:
Optionally you can set up your raspberry pi to start Siri proxy on boot. Once again, just follow Elvis impersonator's instructions:
Personally I've not set my Siri proxy of to start on boot. I kind of like having the terminal window showing me the output so I can occasionally check up with what's going on. If you if you choose to start your Siri proxies this way,  you will have to do it at the desktop level. Connected using VNC and run root terminal. In my case, for some reason it does not remember the path to the install, I simply have to rerun the following three commands in the root terminal to start the server.
  • [[ -s "/etc/profile.d/rvm.sh" ]] && . "/etc/profile.d/rvm.sh"
  • echo '[[ -s "/etc/profile.d/rvm.sh" ]] && . "/etc/profile.d/rvm.sh" # Load RVM function' >> ~/.bash_profile
  • siriproxy server

Modifying the example plug-in

about to go through the details of how to go about modifying or creating your own plug-ins. I believe that is a project for you to figure ;-). However, I did create a little auto hotkey script which will make the process somewhat easier.

My goal was to allow myself to use my Windows environment to use the actual modifications to the example plug-in script. Doing so would give me full access to my voice control,and other accessibility features. Not to mention a nice editor. You can download my autohotkey script here:
This script is just a convenient way to send a final from my Windows desktop to a raspberry. In order for to work you will need to have pscp.exe installed which of to download from the same place you  downloaded PUTTY 


  1. In the first box, this is where you want to send a file. Specify as root user. type in the full path.
  2. The second box is the file that you want to copy to the raspberry pie. Press the select button, go find your file.
  3. in the final box use the select button to specify where you downloaded pscp.exe
  4. modify your source file, save it then press send it. This will copy the file onto your pie.
I created this only has one way send to pi because I don't expect have to copy files back from my pie , very often, if at all.

Conclusion

This should be enough of the pieces to get to well on your way. Goal here wasn't easy tutorial but more to show you where to find hold the parts. I'm finding it surprisingly easy to work with the pie in this manner. So if your voice is still strong in your house I need/use for Siri proxy, a raspberry pie is a relatively inexpensive, not overly complicated and very effective way to get it set up.

Thursday, 16 May 2013

Accessible Plates


One of the projects I've been working on for some time with my occupational therapist was to find some decent plates that worked well for me. This has, surprisingly been far more difficult than one would've expected.

Stay still dammit! I'm trying to eat!
Sure, there is an entire world of disability/accessible plates and bowls. But finding good ones that I liked was not easy. Most of what's out there is either small, made of plastic or not that beneficial and really makes me feel disabled. I still have a very healthy appetite and eat a large portion, so small plates don't work for me. Plastic plates are light and the slide all over the place and I already have enough problems trying to get food in my face. I don't need to chase it down anymore than I already do.

Probably about a year ago when we first started looking at better plates and bowls for me, my occupational therapist gave me a couple samples to try. One that particularly liked was steelite plate. So after using this plate for a few months and having increasing difficulties with regular plates, I decided that I would like to get some more of these plates rather than just one. I asked my occupational therapist for more.She told me that the only had one on hand, and couldn't remember where it came from. Nonetheless I said these are the ones I wanted.

Over the course of several months I was repeatedly told that she was unable to find them and that they were likely discontinued. So one day about two months ago she when asked about the progress on the plates, she explains this again and she says that she will keep looking on her side but that I could also go try a few stores but that she would need a moment to call one of her colleagues to get the names of the stores.

"No problem I say" after all I expect the names of specialty.

She makes a phone call to her coworker speech from in order to and comes back with a list of stores. I wait patiently while she's on the phone, she comes back with:  Bowering, Sears, the Bay, the linen chest, Stokes and of course… Canadian tire. Yes, you read that right. A list of the most common places to buy plates in Canada, possibly even North America.

While I stare at her for a moment completely dumbfounded she grabs a piece of paper and proceeds to write the stores down for me. Okay, now she's insulting my intelligence. I honestly felt like I'd walked into a specialty bookstore asked for the first edition copy of Don Quixote and the reply is "have you tried the public library?" I come to see these experts in the hopes that they have access to resources that I do not have in order to expedite the process in acquiring the adaptations and devices that they need.

Not to mention that having ALS means I don't have the mobility, energy nor time to race all over town to track this down myself. It was my understanding that's why we have an occupational therapist as rehabilitation facility.

AAAAAANYWAY… Enough venting about that.

This frustration sent me on an intranet quest. Through the appropriate use of Google I was able to quickly find a few suppliers. The first ones were unfortunately all in the UK and Europe. They were willing to ship to me in order, but because of the distances involved the order would've had to be a little larger than I had hoped and the shipping costs were, well. Expensive. Here's a couple of the links I found:
Through a few more manipulations of Google, I contacted the North American steelite supplier, a gentleman named Gary who was extremely kind and helpful. They went on to explain that these plates are not available through the distributor as individual units. However they can be ordered by the case. It turns out a case is not terribly unreasonable, especially if you can share the order with someone. The plates come in two sizes. 8 1/2 inch and 10 a quarter inch.

Through discussions with the distributor, here's what I was able to acquire:


What I particularly like about these plates is that they are ceramic like any other plate. Because of this I don't feel like I'm using specialty plates that often. They're heavy and durable. From what I understand they were actually intended for old age homes. They have a nice gently curved been raised age that's not too high and works very well for helping push the food back onto your fork or spoon.

At first, I wasn't sure I'd find a whole bunch of benefit to having plates of different sizes. But I actually do. Some meals are much easier to manage and the smaller plate. For example when eating pasta, I'm less likely to drag my knock on us through my food to push up against the far side of the plate.

Also, one of the great things about having plates of different sizes and colors like this is a help immensely with our coping strategy for a three-year-old son. From time to time we take one of the smaller plates for him two years so he can now have a big boy plate "just like dad" we are hoping to take some of the fear out of the situation with this. He is old enough that he starting to ask about questions.

The coffee mug is a great idea as well, having handles on both sides. It weighs about the same as any other coffee cup, but unfortunately due to the specifics of how my hands are starting to flatten out and deform this cup is proving not be as beneficial as I had hoped. I will say however it is easier for me to transfer coffee from the kitchen to where I sit. Unfortunately it's not really much easier to drink from for me. Mind you that's about the same for any cup these days, I'm having to use a straw a lot.
Yup! Great product.

On the whole, I'm very pleased with these plates and the cup. They're the best thing I found for me to date. There are little bit hard to come by, but worth the effort. You can contact the gentleman who helped me here Gary gbennington@steelite-canada.com or you can go through their corporate site which is where I started.

You can view the whole line of the Rio steelite products here in their brochure.

Tuesday, 14 May 2013

A Little Hack for Dragon Naturally Speaking


I used Dragon NaturallySpeaking a fair bit… Well, a lot… Okay, to be honest just about every time I'm in front of the freaking computer! For the most part, it works quite well and does when they needed to do. However it does have one nagging irritation for me. By default, you cannot set a default user profile to load when you restart your computer.

As we all know, computers (especially Windows) need the occasional reboot. Not having my Dragon dictation online when the computer boots, well is kind of annoying. Especially because having hands that don't work so well and right clicking often being challenging these days I have to go but futzing with the mouse, right-click the task manager icon and select the user profile I want load.

I found a neat little way to force Dragon to load a specific user profile on reboot. Here's how you do it:

open the Dragon in the start menu under startup
start menu --> Start up --> Dragon NaturallySpeaking Quickstart
right-click and edit the properties
add the following the target (you must delete any existing flags and replace it with this)
/User "<YOUR USERNAME>"

Doing so should tell Dragon to load this profile whenever Windows restarts. Be sure to pay special attention to the placement of the quotation marks.

Thursday, 7 March 2013

My New Spoon

It's been an ongoing project for me for a long time now to figure out better ways of getting food from my plate into my face hole. Fortunately, chewing and swallowing it is not a problem for me yet. But getting the food there often is.

This is where caused many explorations into more accessible plates and utensils. Some of which work better than others. Some of which only work for a period of time. I've gone through lots of different cutlery by now and what is commonly accessible to the disabled doesn't really seem to be suiting my correct at this point in time. They seem to be either too large, unbalanced or otherwise unwieldy…

the people at my rehab facility had said they'd never seen
or thought of a design like this
So I've created my own adaptation to a spoon. Check it out:

This spoon is a fairly typical handy accessible spoon which was provided to me by my rehabilitation facility. You can't see it very well and the image that it does have a curve to the left, intended for a right-handed user. Making it easier to get the food in your mouth.

We've modified it by sending down the thickness of the handle quite substantially and by adding the two rings that you can see in the picture. These two rings are simply riveted in place a little loosely allowing me to position them for best alignment to my fingers. We've also added a little soft tape on the inside to just help with spacing. This is a prototype and we are still working out some of the details like where exactly to place the rings. That said, this spoon seems work the best for me at this point in time.

say hello to my new spoon
The rings are something you would find in any hardware store. I believe that intended to hold small pipes in place during construction these modifications were made for me by my rehabilitation facility.Over my next few visits to my rehabilitation facility, we will make a few tweaks to this prototype. But I think it will stay pretty much like this. Right now the rings need to be repositioned a little bit and possibly a little bit of a groove to better hold my index finger in place. But other than that, this is working fairly well.

As for other cutlery, the next step is to see how well this works for a fork. Knives are out of the question for me. I require both hands to maintain the spoon study and get into my face.

On a side note, having a disability friendly plate helps immensely. One with a raised edge helps to push the food onto your fork or spoon. I wouldn't say it's required, but it does help prevent the food on your plate for making a break for it.

And, just for some fun. You can see the whole "Rejected" video here: Rejected

Stupid, yes. Funny, even more so ;-)

Wednesday, 27 February 2013

A First Prototype…


One of the unfortunate side effects of dealing with ALS is having to deal with the progressive loss of balance. Usually resulting in the unexpected face plant. In my particular case, my balance is still pretty good but I am prone to falling from time to time and as most of my losses in my hands and arms. I am unable to properly protect myself in a fall. And once down, getting up is starting to become rather difficult. I have had a few occasions were fallen and required help to get back on my feet.

Nevermind the subject of risking more serious injury…

So this got me thinking. What happens when I'm by myself and I fall somewhere in the house and I'm unable to get up? How do I call for help?

Well, there are for sure services like the life alert bracelets and the "help by fallen and I can't get up" panic button.

This got me thinking, sure I could sign up for one of the services. But I already have a smart phone which I use quite regularly for my home automation systems and my television remote control. Not to mention it has a Siri voice recognition, which is one of the reasons why I bought it. So do I really need the life link service? Other than the built-in fall detection, my iPhone will cover my needs. Thus the question becomes, how do I keep up with my all a time? With nonfunctioning hands, I need to keep it attached to my person while remaining accessible. Not to mention, anything attached to my belt, one involving a clip to dock the iPhone are pretty much out of the question. I don't have the range of motion to access my belt, nor the dexterity to unsnap the phone from a clip.

Now, I bought my grab it pack because it had the thigh pocket for the cell phone for just these reasons when I'm out of the house. But it's not quite as practical to wear all day while I'm home. Consequently I started thinking about something similar to a fighter pilots G suit. Below is an image on the right that this pilot is flight information strapped to her thighs. I realized that this is actually a pretty safe place to carry my iPhone. Should I fall, it'll remain accessible and it is very unlikely that on the top of my thigh my iPhone will receive a direct impact. And I know from experience with my grab it pack  that Siri will work just fine at this distance (assuming there's not too much ambient noise, but that's the same anywhere)

How could I do this with my smart phone? What could I adapt?

It turns out that Belkin has an armband product to hold iPhones for when you go to the gym. It is quite secure and will allow you to use the touchscreen through a plastic cover. It is however sized for an arm and not a thigh… Just a bit of a size difference, even with atrophy. Nonetheless, this is pretty close to what I'm looking for and reasonably easy to adapt. It was also reasonably inexpensive, around C$25. It will definitely work as a first prototype.


So with the help of my re-adaptation facility, we went about extending the length of the armband strap so it would fit my thigh. We replace the Velcro with a one-inch snapdragon buckles make it easier for me to remove, and less fidgety than messing with Velcro, i.e. Once I set the size, I don't have to adjust it every time. We also added a vertical loop so I can attach it to my belt or might grab it back if I so choose. The vertical strap is essential to prevent the armband from sliding down my leg. Don't want it to be to type all the time…

I know, looks a bit dorky
This is what we came up with...


I realize that this looks a bit dorky. But the fact of the matter is these days I have to focus on function over fashion and if it gives me a degree of ease of access and safety within my own home… So be it. Dorky.

Now, this works reasonably well. But not perfectly. First of all, in order for the iPhone to fit within the Belkin case it has to be removed from any other case. E.g. the iPhone has to be "naked" to fit properly. Also is an extremely tight fit making it nearly impossible for me to insert or remove the iPhone to the Belkin case myself.

The plastic cover over the screen does work and allows me to use the screens touch functions. However it is not completely flush to the screen, removing some of its sensitivity. It is also a little bit tricky to properly access the home button. But not impossible.

Finally, the strap from the hold and position from my belt is essential. That said, options of where to attach it to the Belkin case were very limited and the only place it could be attached without compromising the accessibility of the iPhone in the case causes a slight rotation of the case when it's attached to my leg making it just a bit uncomfortable. What do you expect, first prototype ;-)

I really should mention that I am actively considering getting one of those life alert devices and it does have some significant benefits that should not be overlooked. One of the reasons why I'm looking into this is that my needs are not quite there yet and I really do want to minimize the amount of devices and things I have to drag around with me. I'm looking at the phone as a viable option because I carry it all over the place. I use it to control my TV and my home automation system. And of course, Siri for communications.

Monday, 21 January 2013

Snapdragon Buckles

1" snapdragon buckle
I like my grab it pack  No. I love my grab it pack  That said, it is equipped with the standard slide clips and as we've mentioned before, with the loss of the ability to pinch this isn't really working for me anymore. I just can't release the clip. So after doing some research online I came across a very interesting, military grade quick release by ITW Nexus called a snapdragon buckle.

Instead of pinch, the intention of these is to be a quick pull on a tab or a loop which releases the buckle. Far quicker and easier than slide clips.

2" snapdragon buckle
The problem is, these are fairly hard to find because at the moment most of them are designed for military supply. So unless you need a box 1000 of them, it's a little tricky to find where to order them from. I however got little bit lucky. I searched on the Internet and the supplier lists and fortunately there was one relatively local who is willing to help me out. He sold me 5 2 inch buckles and 5 1 inch buckles.

So with the help of my rehabilitation facility, I added some buckles to my grab it pack (a 2 inch buckle for the waste, and a 1 inch buckle for the leg strap) and a 1 inch buckle to my shoulder bag. Overall I'm pleased with how well this works for me. Check out the video below. I should however first point out that when I release the shoulder strap, I'm usually sitting down. 

Now, as I mentioned these are military standard product meaning they are very strong and durable which can make releasing the snapdragon a little bit challenging. Especially for the 2 inch buckle. In my case I found the amount of force required to release the 1 inch buckle the one-inch to be just fine. I did however have to have the 2 inch buckle modified. This was done by my father who simply took a file to it and poured down the plastic teeth on the inside of the buckle and on the mail portion of the buckle reduced a bit of the profile, and rounded the edges a bit too reduce the amount of purchase between the two pieces. Only took him about 10 min. And since then the 2 inch buckle works absolutely beautifully.

So the big question is: "where do I get me some?"

Well the only place I found online that will sell in smaller numbers is CP-gear. However they only have 1 inch and three-quarter inch buckles in their inventory (last I looked).
You can also go the route I did, which was to find a local supplier from the IT W nexus distributors list. Give them a call, the guy I spoke to was really great and very willing to help me out. http://na.itwnexus.com/content/list-distributors

Pro:
  • great alternative to slide clips.
  • Military grade, very strong
  • reasonably priced, on par with the slide clip replacement
Con:
  • military grade plastic. may require modification
  • very hard to find. I wasn't able to find any in local retail

Wednesday, 9 January 2013

Home Automation, the 3rd Attempt

Introducing the "Jarvis Mod"

Wow. The Christmas holiday season can really get in the way of any plans you have for personal projects. I actually had the autohotkey script done at in early December, but all the obligations for this season and having the family around really slowed me down. Not that I am about that quickly anyway ;-)

Now I'm back to it. Introducing, the Jarvis mod for your Vera home automation system. But first a little back story.

We've talked before about how I'm starting to rely more and more on voice control for my computer. But that doesn't really help me out for the rest of my environment, so I started wondering if there was a way I could use voice to have some control over my environment. Ideally with minimal cost and using tools that are ready have.

The particular problem I was hoping to address was to be able to run my home automation system through my iPhone using Siri. I mean really, who would not want to be able to walk into their house speak a few instructions and have your environment respond to you in a similar way to what you see on Star Trek the next generation, or Jarvis (hence the name) from the movie Ironman.
Well, it turns out that there is!

Obviously, it's not going to be anywhere near as powerful as what you see in Star Trek or Ironman. However I can use Siri's existing functionality to send a message to my Vera Zwave home automation system. This is by definition a hack as it does use some digital duct tape and bailing wire to get this to work. But for my needs, it works very well. Check it out…
So how did I get this to work? As you can see from the video, I use the Siri to send a message to my computer via (a secret) e-mail. Microsoft outlook receives the mail, recognizes it and fires a rule to create a text file in a specific directory containing the contents of the e-mail. There is an auto hotkey script running on my PC which waits for this text file, parses its contents and then sends the appropriate notifications to my Z wave system.

It's probably easiest to visualize in the following chart.
The Jarvis script is at its core very simple. It is a simple text parser which reads the text for key phrases such as: "turn on the family room light". It doesn't use any fancy heuristic to figure out the meaning of the sentence. It simply looks for keywords in a sentence. In this case those words would would be "light", "on" and "family room". It doesn't care about the order, just their presence. I can however send multiple instructions via one e-mail using Siri. Each sentence is interpreted as one instruction. So I can have several sentences to fire several different devices. The script looks for the "." As a separator between instructions.

It is very easy to add more commands. Commands presently are:

  • turn on/off the basement/living room light
  • lock/unlock the door
  • run scene <scene name>

Now obviously this is going to reason some security questions. As I for sure do not want some stranger firing an e-mail to my house and operating my devices. So I do have some security protocols built in. Outlook requires the message to be from a certain e-mail which will remain secret ;-) it is also easy enough to integrate a password requirement into the autohotkey  Script. This will be a simple day password (not yet implemented) where if it is absent from the script, Jarvis will not operate. It is also very easy to detect multiple, repeated attempts.

Also, I only activate my Jarvis script when I expect to need it.

Some might also ask why I chose to use autohotkey  n this way as opposed to simply firing the instructions via Outlook. While this is possible to do via the integrated VBScript in Outlook I would have to duplicate the same code into the Microsoft speech macros to get the same functionality. I.e. doubling my maintenance requirements. Any change to one would have to be made to both. In This Way, Outlook and the speech macros simply messengers. Any changes, modifications or updates are simply done in the Jarvis script only. Also by using autohotkey  it is very easy to add additional functionality to interface with any other system running on my computer. For example it would be easy enough to add commands to start iTunes and play music over my airplay system.

Unfortunately however, this Jarvis mod has been written to operate with my z wave system and PC set up. This means that unfortunately it will not be immediately portable into your environment. My intention here was to share the methods and show that it can be done. That said I will be including the text file with some additional instructions on how to do so. You will however require a basic autohotkey knowledge to know where to make the appropriate changes to your script.

Okay, I'll admit it… I just
wanted to use this picture ;-)
You can grab the Jarvis files here: the Z wave Jarvis Mod however the Windows speech macros are not yet included. Functionally, they will be nearly identical to the VBScript for Outlook.

(Update: as of 14/1/2013 speech macros are included and functional)

I will be working on a tutorial on how to properly set this up in improving the provided instructions.

So I think it's safe to say that the myth you can't extend Siri functionality or improve on your voice control functionality is pretty much busted ;-)That being said, I really should point out will once again that this script is more of a first functional prototype or a proof of concept rather than a final product. And by definition, is not really modifying the function of Siri or any of the other systems, but extending the functionality by tying them together through another script… By definition to me, this is a hack ;-) I will be periodically updating or reworking the script.

Monday, 3 December 2012

Hacking the Griffin Beacon

I've talked about the Griffin Beacon in a previous post and how the use of batteries really limited its function.So with these limitations in mind, and my desire to use the thing… Because it is far easier for me than a regular remote control… I contacted the tech department of my rehabilitation facility with the request to convert it to run off main power.

Now, this conversation has been going on for several months, and understandably the department is really quite busy. So I have no problems with the delay in terms of getting answers in part because my needs would quite as immediate. But finally I got an answer about two weeks ago explaining what could be done, here is some of what they suggested in the mail:

  • I would have to send in the Griffin Beacon for modification
  • this modification would void the warranty
  • the modifications would cost around $90
  • they recommended as an alternative to use rechargeable batteries or Ni-MH rechargeables 


Now after a couple months of playing e-mail ping-pong, this frustrated me a little bit so I decided to look into it myself.


First of all, looking at the bottom of the Griffin it runs on four AA batteries, which from my high school physics class tells me a maximum of 6 V when mounted in series. So it should be a very trivial thing to bypass the battery box and hook it up to in AC adapter.

My first idea was to find an adapter of matching power, spliced the lines and attach it to the relevant ports in the battery compartment. Oh right! My hands don't work… Dammit! Can't do it myself. So for some ideas I applied some Google-fu and very quickly found the following… How to modify your Griffin Beacon to use an optional AC adapter


Well I'll be a monkey's uncle, this is almost exactly what I was thinking of. So I contacted my brother back in Vancouver as I know he has access to some of the resources. We talked about it briefly and he had pretty much the same idea as shown in the Griffin hack.


He went to work on it, finished it inside of 20 min. and put it in the mail. Two days later I had it here in Montréal, plugged in and working reporting a constant 60% power (we used a 5 V adapter instead of the 6 V) it's been plugged in and running for four days now…


The other reason I looked into this is because I really had some issues with the proposed solutions from the "experts"…

  • estimated cost of $90
    • the Griffin Beacon itself only costs about $70, I find it hard to justify an adaptation that exceeds the cost of the unit.
    • My cost so far is about $15 for shipping, and $10 for the adapter. If you have someone can do it for you but you probably do it for a $1.50 as shown in the link…
  • voiding the warranty
    • the Griffin Beacon hack does not void the warranty as no internal components are modified
    • there is no risk of fire or other hazard as we are using exactly the same power as provided by the batteries.
  • use of rechargeable batteries
    • yes there is a cost issue with changing the batteries, but in my case this was not so much the concern. Our batteries are purchased from Costco in bulk and therefore the individual unit is quite cheap. The greater issue for me, and while wanted this adaptation was so that we would not have to change batteries. I am unable to do so did my dexterity limitations.
      The Griffin Beacon hack completely removes the requirements for changing batteries.
    • Ni-MH rechargeables suffer from the same replacement issues we are trying to resolve
we taped the Dowells as we cut them a touch short…
So once again being proactive pays off. I'm very much learning that you can go see the experts for advice, but it is not always in your best interest to treat their solutions as the only one. With a little bit of ingenuity and time, very often you will come up with solutions that are best for you. After all you are the one living the situation, they are not and at times they may not see the simplest of solutions for whatever reason… These can often be the best and most effective.


that's right! This guy! Thanks!
I would also just like to take a second to give a shout out to Huy Le for his generous contribution to this blog! Thank you so much, it is greatly appreciated.

Pop me a note if there's something you'd like me to review specifically :-)